
Bread Boards
Construction and application
By John Kunstman
Hello, a little bit about me and my background. I am a firefighter / paramedic with over 20 years
riding on the trucks, with instructor certifications in both firefighting as well as emergency
medicine, amateur professional hobbyist woodworker; Amatuer in the fact I have not had formal
training in woodworking mostly trial and error, researching in books, internet, furniture stores
both antique and new. Professional in that I do sell what I make and have a stable client base
of repeat customers. Hobbyist because I started this as therapy for myself from my career of
helping others in their times of misery.
As a kid hanging out in my dad’s shop; a humble 1 car garage where he built anything and
everything our family needed. Not because it was the thing to do but because it is by far
cheaper to build it then buy it. They were not the prettiest pieces ever made. But they served
their purpose. Ever since I was old enough to get in his way, I was his helper and soaked up as
much information as I could. For the last 20 years or so I have been making this or that for
whomever needed it. It wasn't until about 10 years ago after the death of my second wife that I
needed the most therapy and dove head first down the (rabbit) hole and started learning to
make “fine furniture” I think it was a way to distract myself and allow myself to grieve in peace.
A Brief History of breadboards: Did they evolve from Battens? Were breadboards made to be
more “classy” then a batten fixed to the face of a panel. With that in mind, does the apron of a
table. Or the frame wrapped around a panel not act as a batten? Do they not traverse the grain
of the wider piece and resist the cupping movement of the panel?
.
Be it a panel for a door, a chest lid, table tops, battens were used to keep the panel or wide
board flat. In its simplest form a batten is nothing more than a board nailed across the grain to
other boards to keep them together and flat.
When furniture and architecture became fancier and more elaborate, so did the construction.
Battens, while still a necessity became hidden or placed in less visible areas. And where they
could not be hidden they became design aspects. They became design elements the same way
joinery became a prominent feature in Arts and crafts furniture.
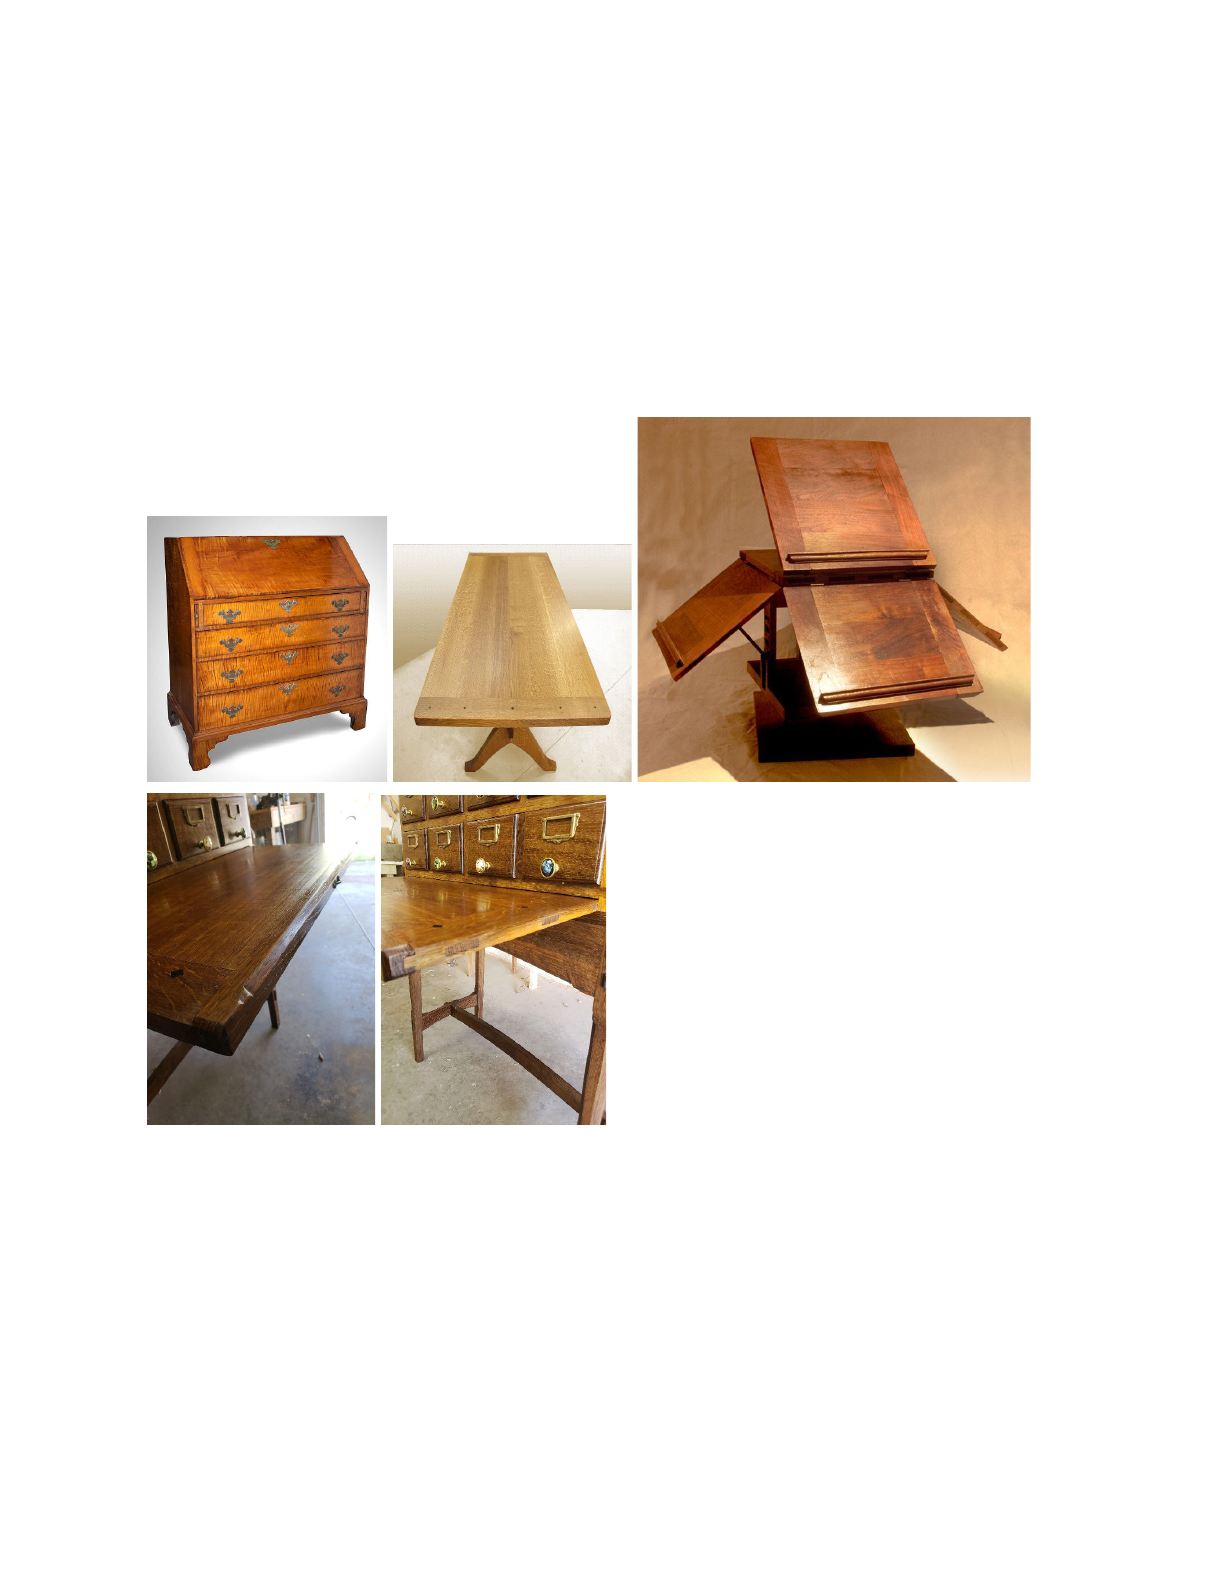
Integrated battens attached to the ends of the panels by means of tongue and groove with
tenons made their appearance in the finer furniture. Commonly used in writing surfaces on
Secretary desks, fine dining tables. Book stands. And other areas where a panel needed to be
flat, thin and not framed.
What is needed to make a good breadboard? Before we look at the construction of a
breadboard, we have to start with the right materials. Solid woods. Hard or soft, but free of
knots, checks, twist and warp. If it is already twisted or warped, it will not lay flat. To make a
good breadboard one has to allow for the panel to move. It needs to be secure in one spot
along the panel. Either end or the center. As long as the panel is allowed to move your
breadboard will keep the panel flat and it will not split or self destruct.
Panel construction:
To start, make your panel, typically the panel will be edge glued boards numbering 2 or more
depending on the size of the panel and the width of the boards. Flatten the top or show surface
and flatten the bottom enough to have a consistent thickness to the panel. It does not have to
be perfectly flat and co planer, but it needs to be close. Likewise your breadboards need to be
milled flat, coplanar and 4S square. Leave them overly long by 3 to 4 inches the ends do not
have to be square, but the edges and faces do need to be square to each other. I mill my
breadboards a bit thicker than the panel. Typically 1/16” to ⅛” thicker depending.
Determine the thickness of the tongue with tenons. Typically I like to use a thickness 1/3rd or
so the thickness of the panel let's say our panel is ¾” thick, This means I would like my tongue
with tenons 1⁄4” thick. And centered in the thickness of the panel.
The tongue part I like to make it half depth as the thickness. To my eye this is very pleasing.
Yours may differ. The tenon that extends past the tongue needs to be long enough to support
the drawbored peg I find a tenon at least an inch longer to be sufficient. This means you will
have at least 1 1/2” inches of the panel inserted into the breadboards. Which means your
breadboards need to be in the 1 ¾ inches or wider range.
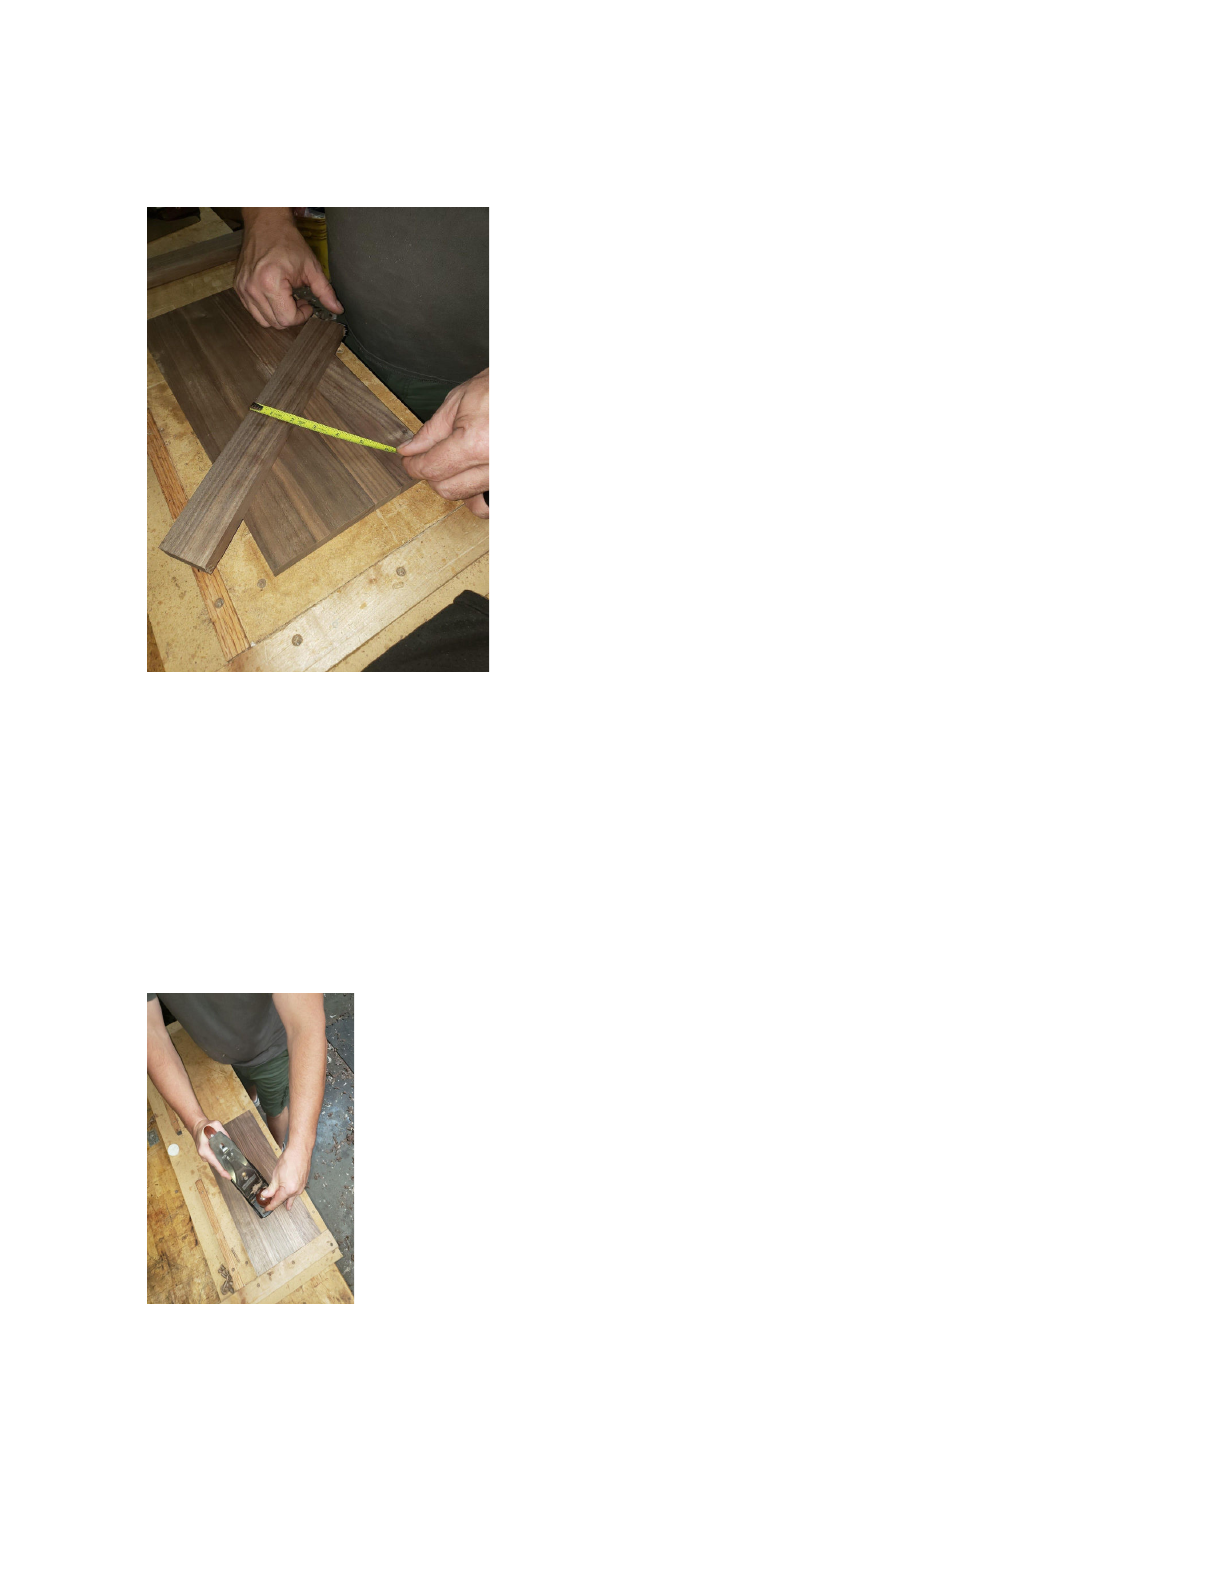
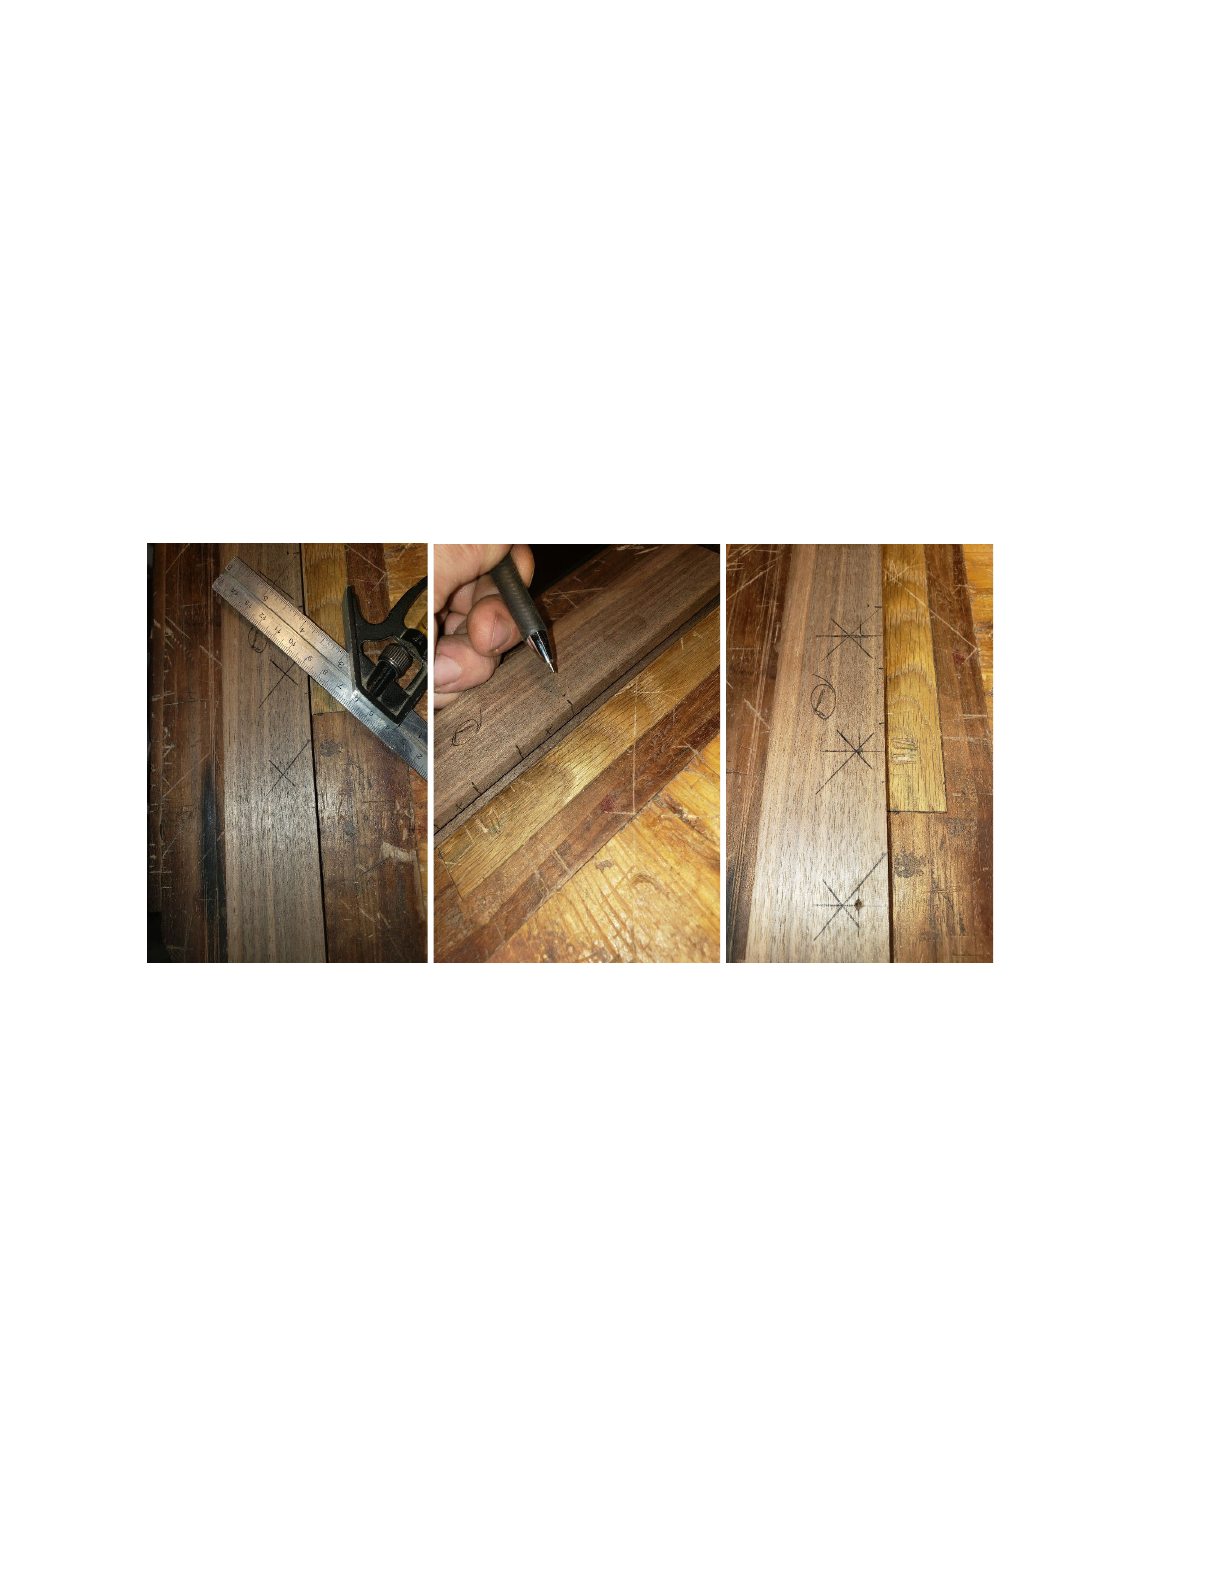
Visualize the top to determine the look. Match the grain patterns with the breadboards. Lay the
panel on the bench, then place the breadboards on top of the panel and move them around until
you what you see. When you do then clamp one breadboard to the panel and bench nice and
square, making sure to leave enough panel material to form the internal tongue and tenons.
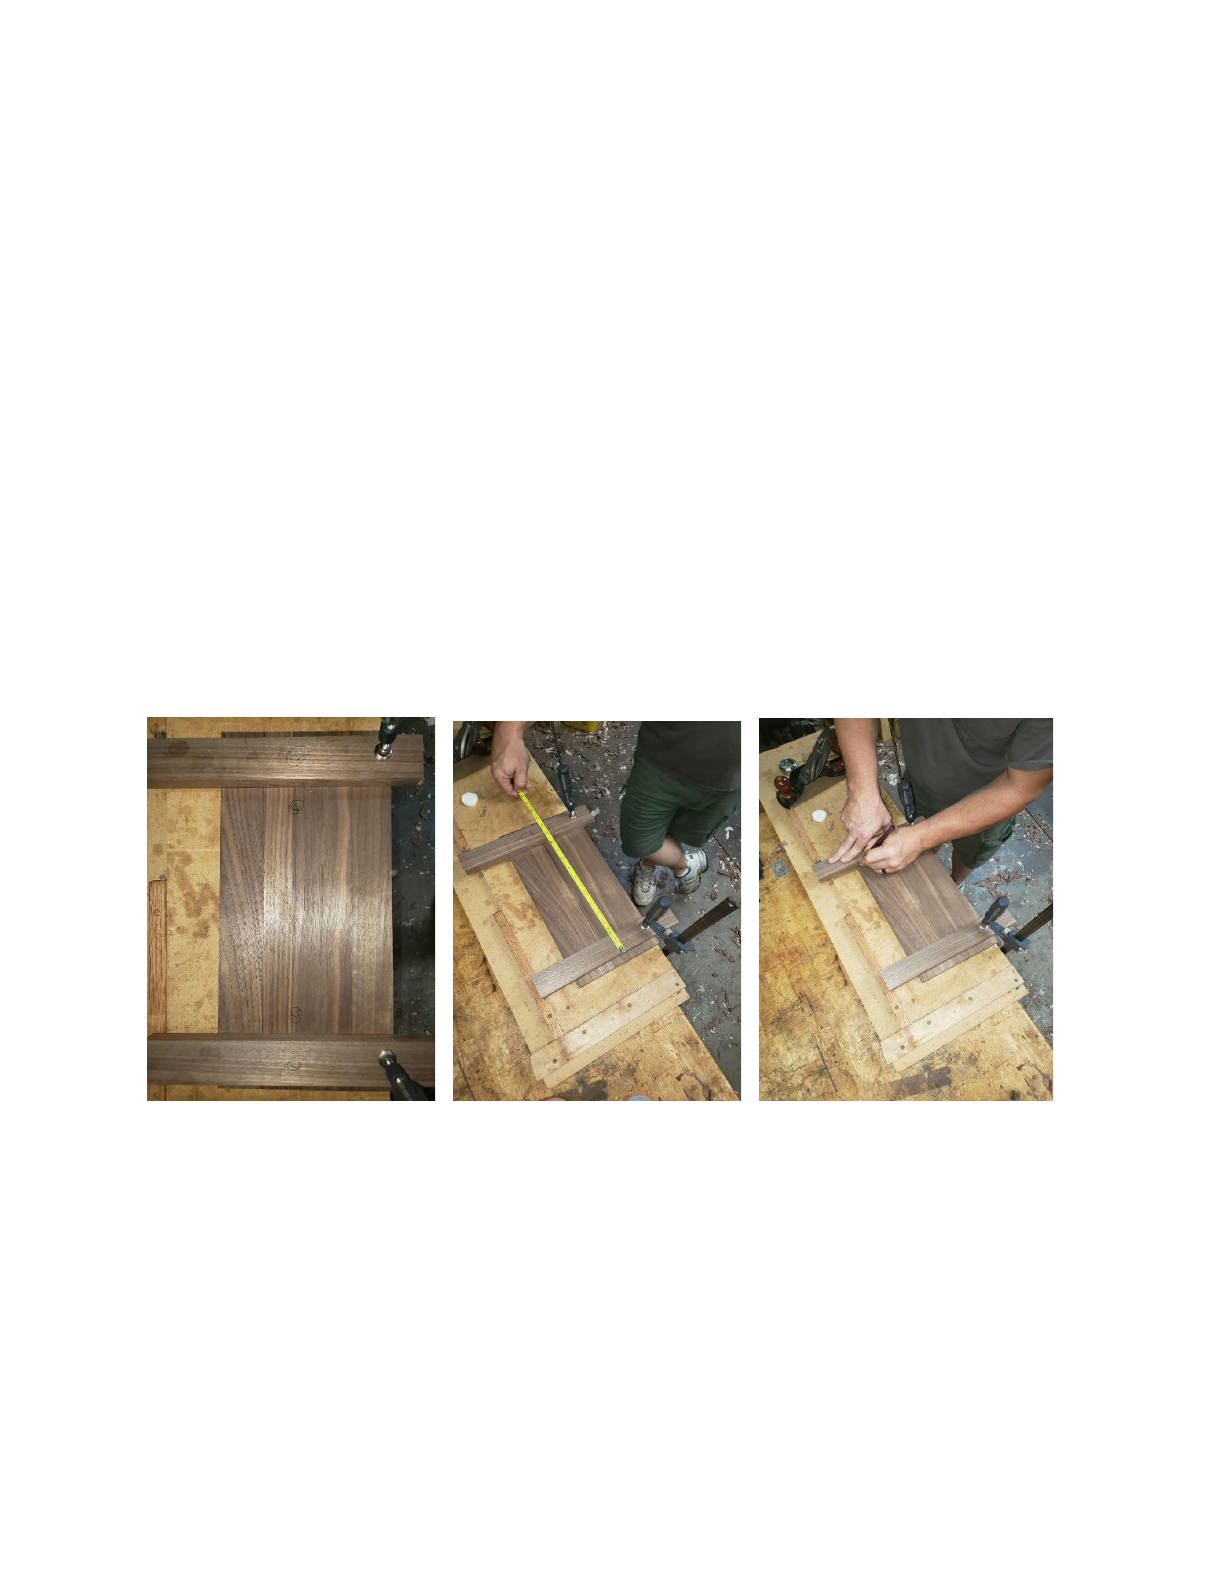
Next measure to the desired length to the end of the other breadboard. Square and clamp the
second breadboard in place, Mark the breadboards L & R as well as L & R of the panel. knife in
the line on the inside of the breadboards. Use a light touch and make a few passes. It is easier
to make a few light passes then correct a deep pass where the blade strayed off course.
Unclamp and stow the breadboards, transfer the line down both edges. On the bottom use a
straight edge and connect the lines if you do not have a square long enough. Flip the panel
again so it is face up. Measure over the length of the tongue and tenons towards the end on
both sides. Mark a square line across the panel. This is also where you will cut the extra off the
panel if needed. Clean up the rough saw marks if there are any.
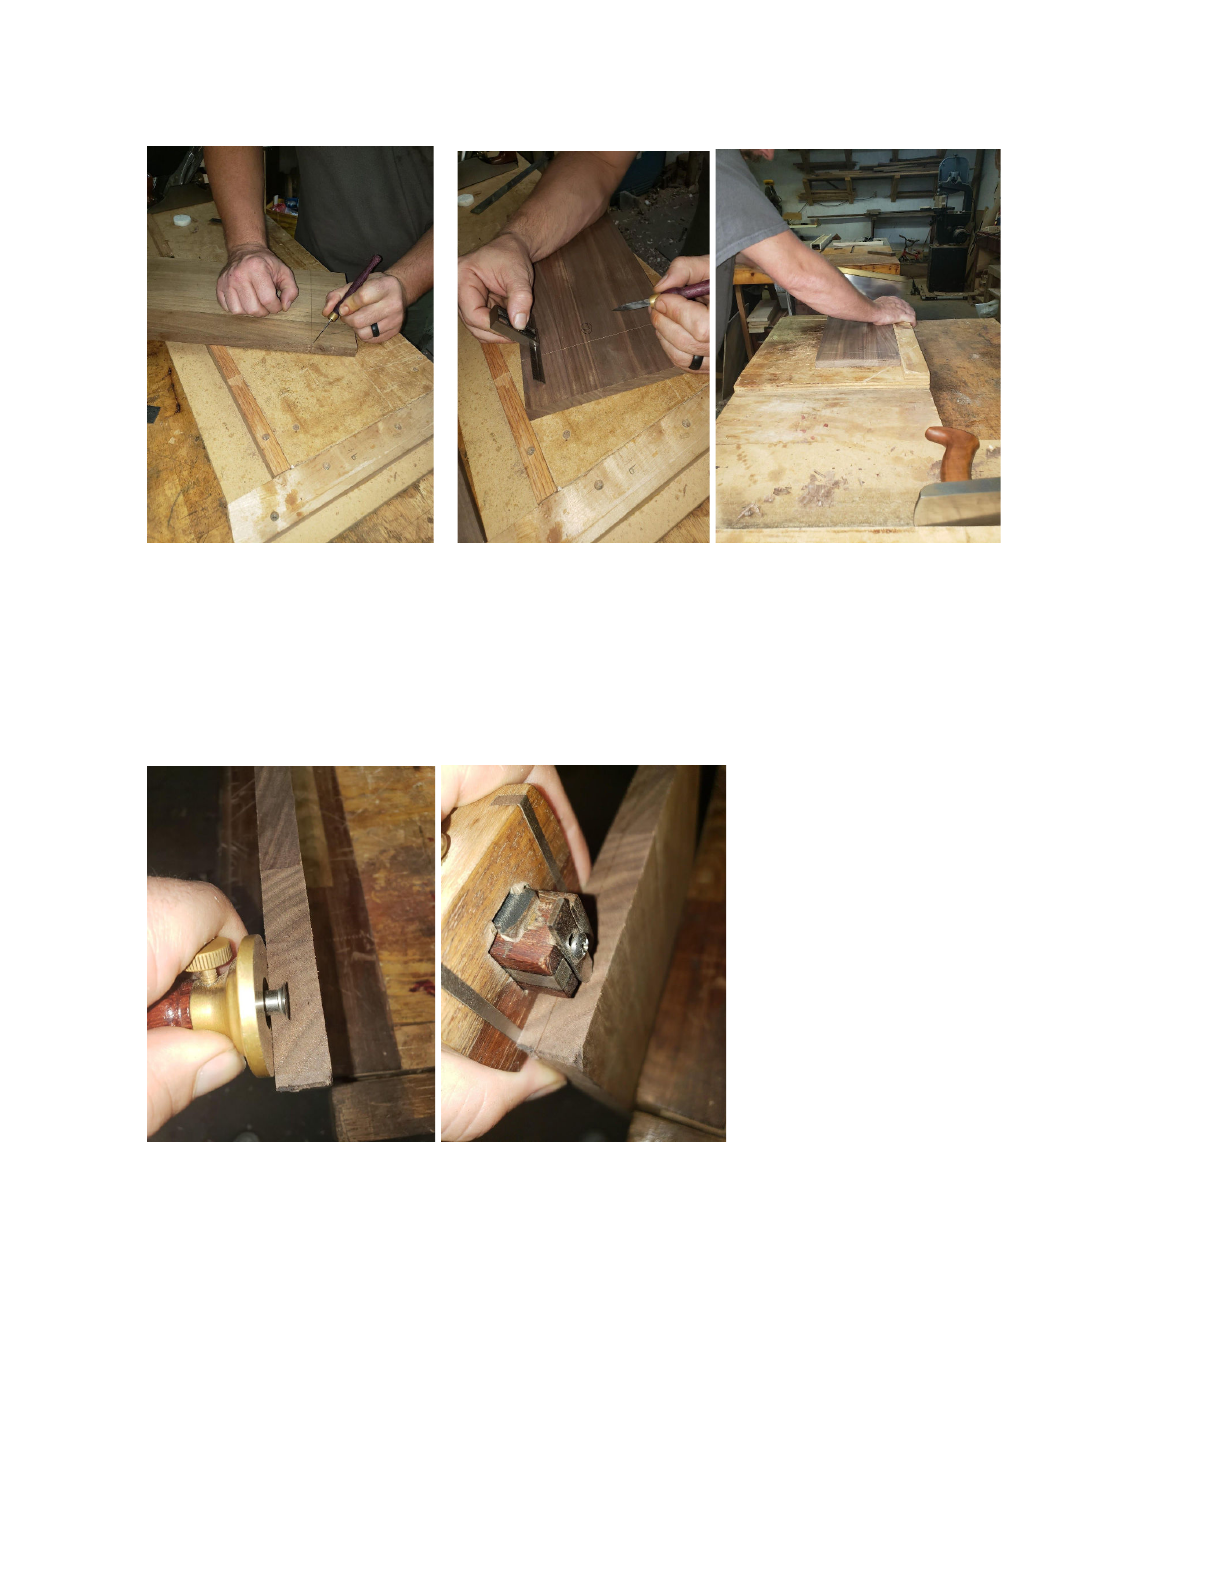
Set your marking gauge to ¼” mark the edges and ends of the panel from line to line on both
sides.referencing off the face of the panel. (I do not like tenon gauges so I do not use them. I
have never mastered them and have not had good luck keeping them set right. So I use 2
gauges instead). Next, measure a heavy ¼” or light 5/16” set your second gauge and make this
mark referencing off the face of the panel the same as you did with the first mark.
Chisel down the knife line on the waste side to make a “class A” cut. Take the corresponding
Breadboard and clamp it face to face to the panel on the inside of the knife line. This will give us
a guide for our saw. Leave a touch of space from the knife line and the edge of the guide.
Depending on how daring you are depends on what a touch of space is. Saw down across the
panel to the first gauge line. Use a chisel to remove the majority of the waste from the tongue.
Clean up the tongue cheek with rabbit plane and bench / block plane. Use the rabbit plane on its
side to clean up the shoulder to the knife line. Repeat this 3 times for the remaining tongue
cheeks and shoulders.
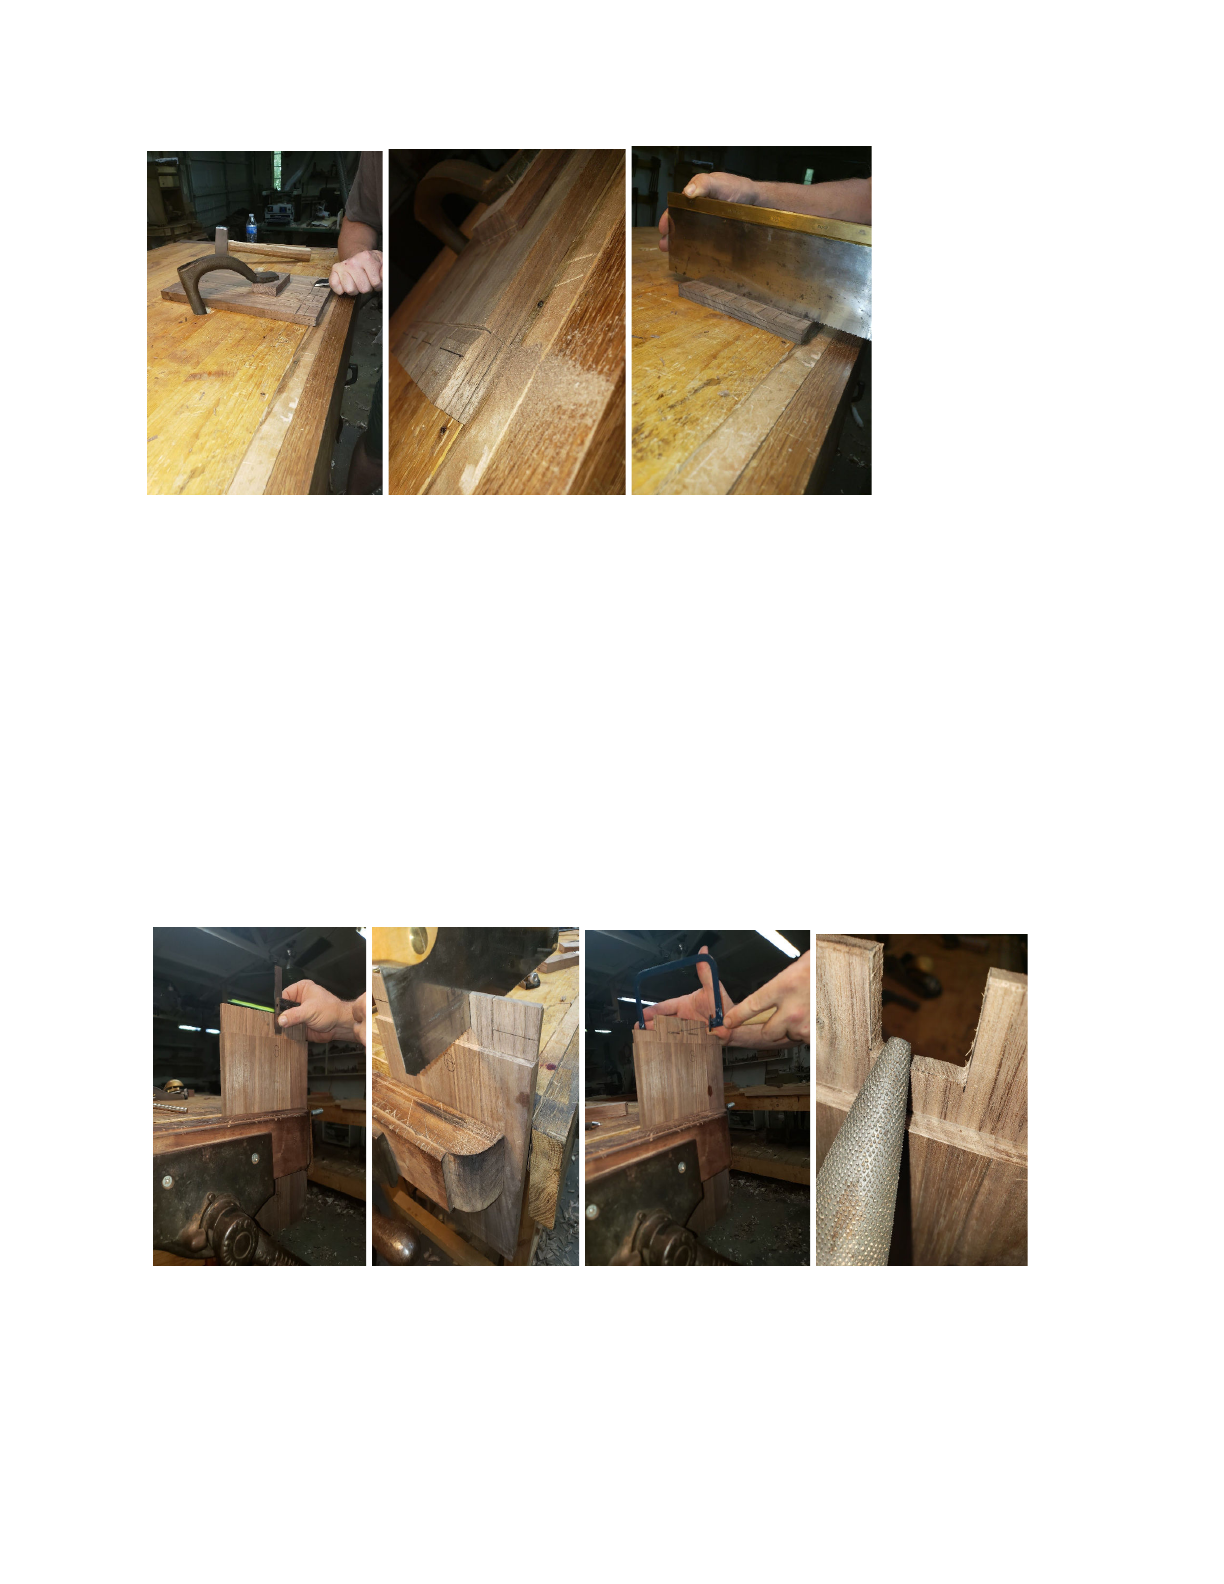
On breadboards secured or glued in the center. It is essential to have an odd number of tenons.
If your breadboard is secured on the front or back you can have an even or odd number. For
this Demonstration, we will be securing in the center. So we will have an odd number. 3 for
smaller 5 for medium and 7 for larger sized panels. Start by finding the center of the panel.
Step off the centers of each additional tenon. Measure the width and step them off from the
centers. Square them down to the shoulder. Measure from the shoulder the depth of the tongue,
in our case 1/2” mark this line in from each edge to the first tenon. Between the tenons, I like to
mark my line narrower than the outer edges. This makes for easier assembly. Using a tenon
saw, cut down the length of each tennon to the tongue line. Use a cross cut back saw to cut the
tongue to the first tenon. Then use a coping, turning, fret, band or jigsaw to cut the waste from
between the tenons. Clean up the rough edges with a suitable tool. Chisel or rasp works great,
I will leave the ends close to the edges clean crisp and square for about an inch or so. The
tongue between this and each of the tenons I like to chamfer or round over.
.
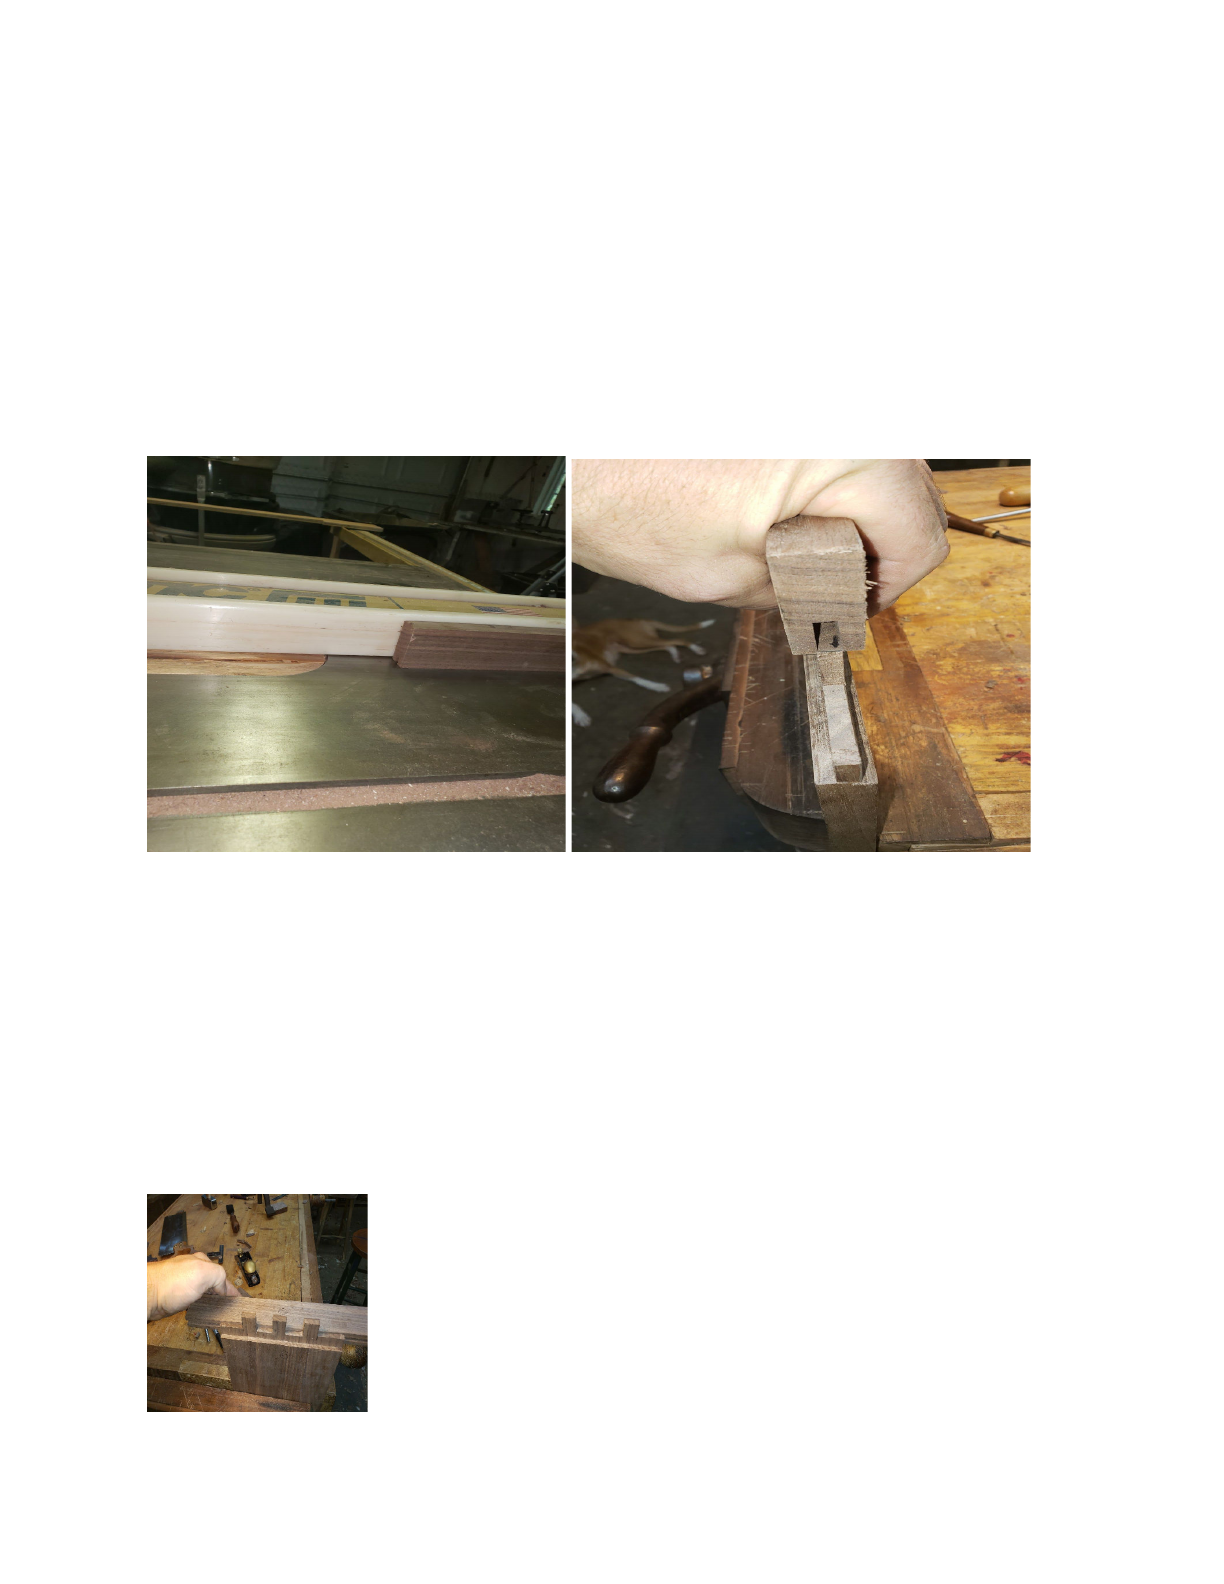
Breadboard construction:
Using a table saw, or plow plane or router in a router table, cut a groove down the center of the
breadboard along the same edge you used as a knife guide, In our case for this demonstration
the groove is ¼” wide by 1/2” deep, if you use the table saw as I do. Flip the board face to back
along the fence to center the groove. Make small adjustments to the fence to get to the ¼”
width. Test fitting between each adjustment. Ideally you want it to be close to fitting but still too
narrow to fit on the tenons and ends of the tongue. I find it easier to adjust the thickness of the
tongue and tenons then the groove and mortices. Ideally, your mortice chisel should fit the
groove perfectly, and yet be a touch narrower then the tenons.
Lay the breadboard along the shoulder with inner edge laying flat on the face cheek, center the
tenon by eye leaving an equal amount of overhang off each edge. Transfer the width of the
tenons to the edge of the breadboard with the groove. Square the marks across the groove. The
center Mortice needs to be a snug fit like any other tenon in furniture construction. The outer
mortices need to be wider than the tenons to allow for seasonal wood movement. You can use
the spreadsheet available by Christian Becksvroot or other reputable source to determine the
exact amount of movement you should expect to have. Typically I find 3/16” or so enough room
to allow for movement on both sides of the outer tenons. Adjust your outer mortice lines
accordingly. Or just wing it when you transfer them from the start! How daring are you?
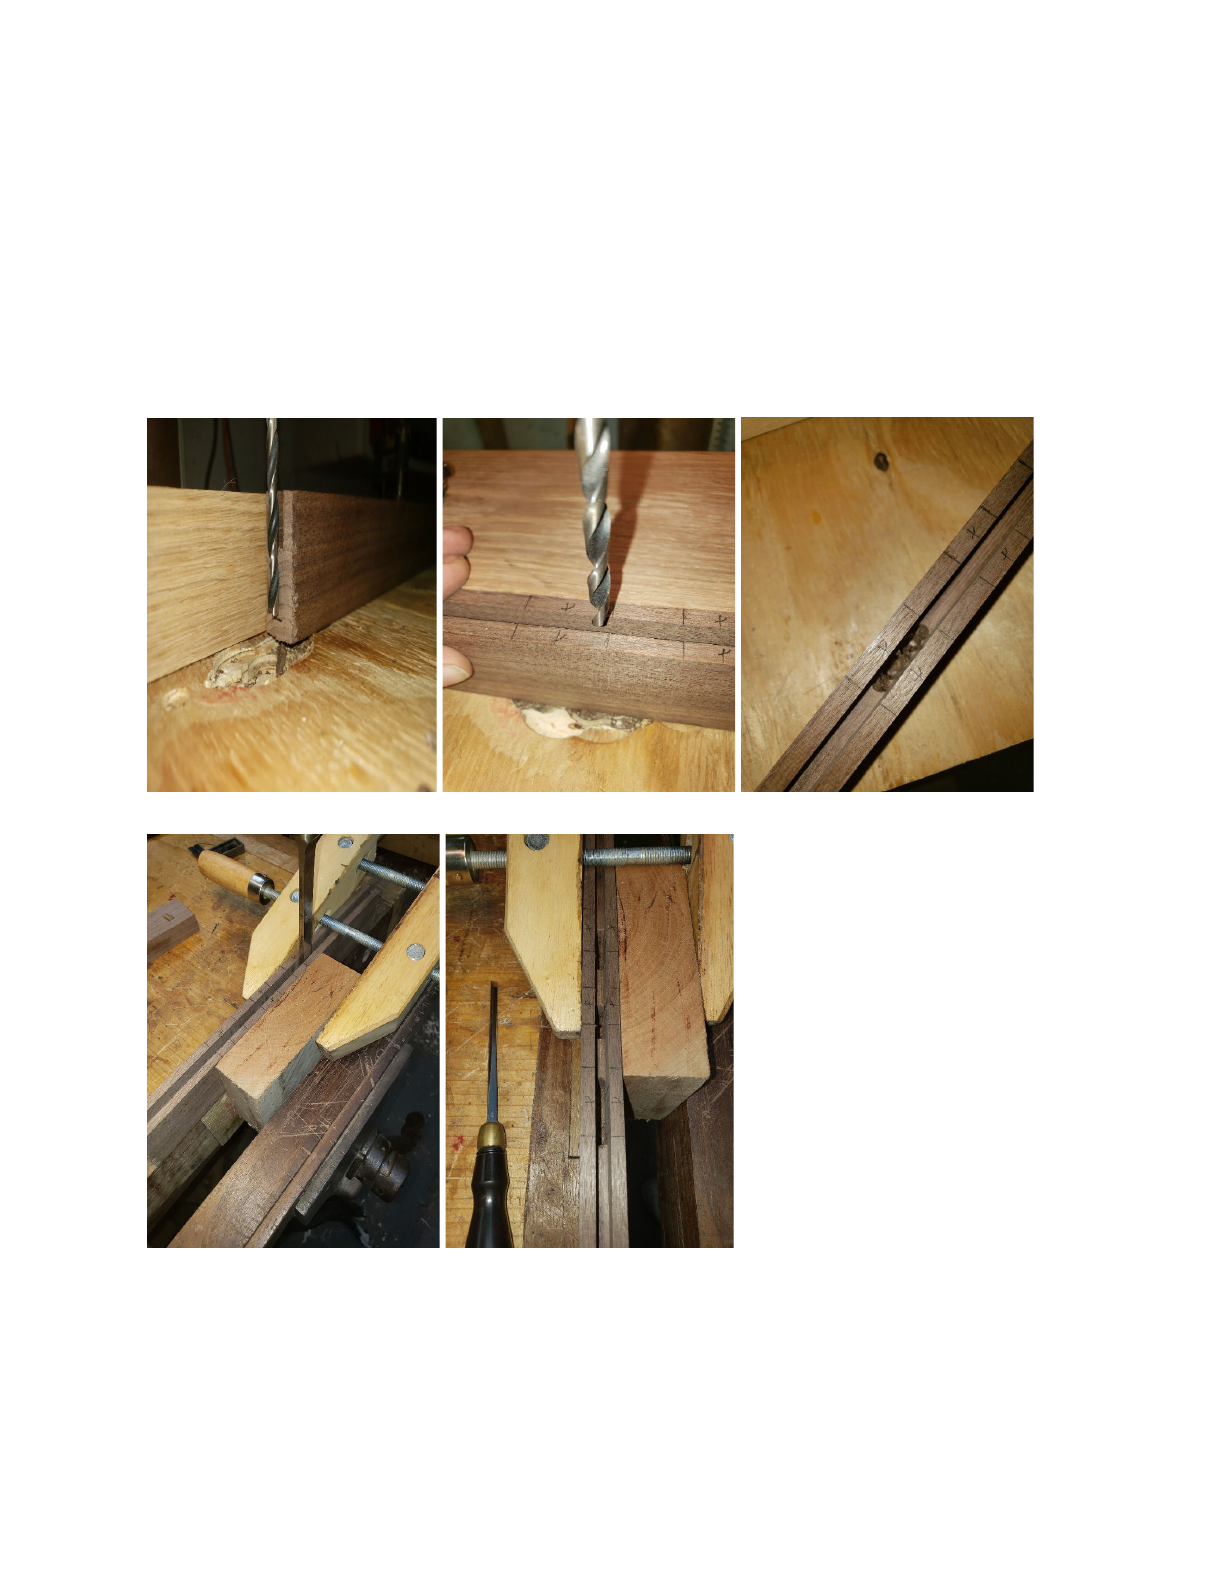
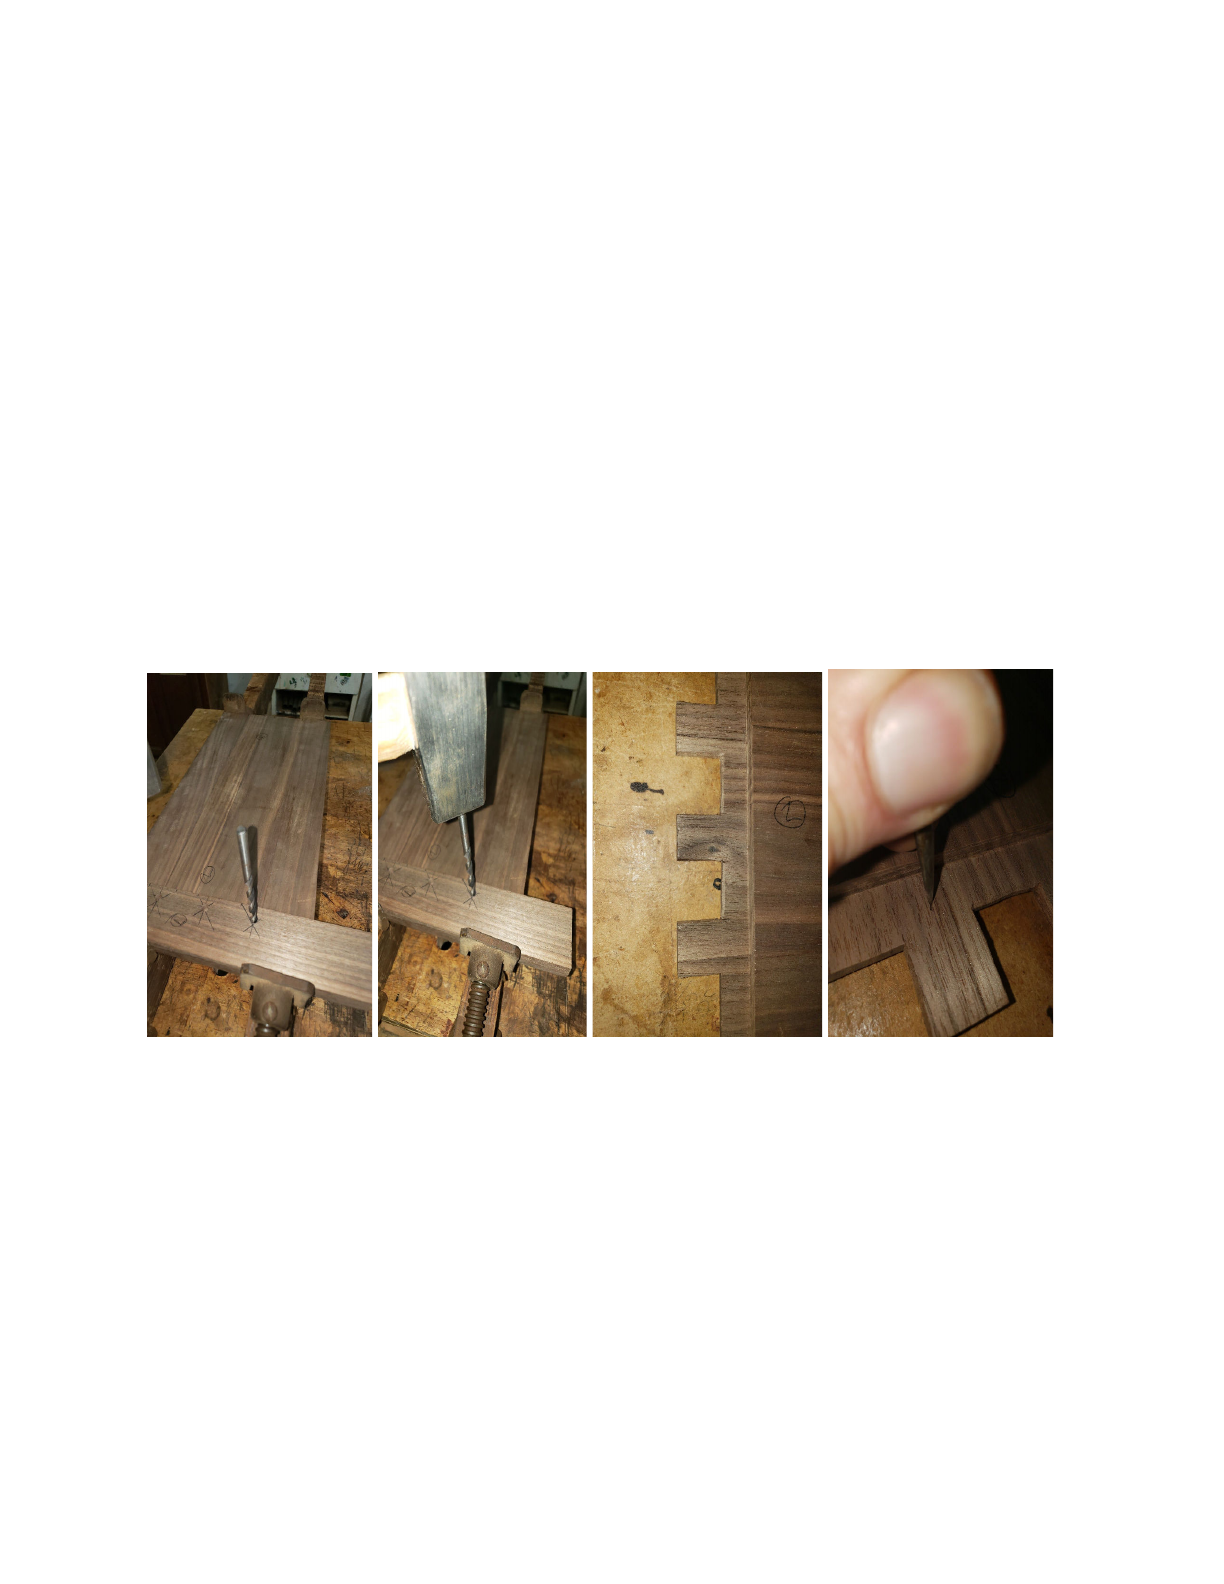
Now the boring stuff, bore out the mortices between the marked lines to the depth of the length
of the tenon. This can be done in a number of ways. Brace and bit, mortice chisel and hammer.
Drill press, router with an upcut spiral bit, hollow chisel mortiser, hand held drill cordless or
corded. Domino? Clean up the mortice walls with a wide chisel and square up the ends with a
mortice chisel or bench chisel. Remember, the center tenon and mortise needs to be a good
snug fit. And the outer ones need to be snug along the faces and have room on the sides or
edges.
Panel and breadboard union:
Test fit the Breadboard to the tenons and the outer edges of the tongue. Hopefully the groove is
just barely too narrow to fit. Refine the thickness of the tongue and tenons with a rabbit plane
until there is a nice snug slip fit, ideally the breadboard will slide into place and meet up along
the shoulder line nice and tight. This rarely happens for me. I usually have to adjust something a
little bit more to get a good seamless fit.
Issues I normally find.
● Mortices need to be cleaner (chunks left in the bottoms)
● Mortice faces need to be parallel and not wedge shaped.
● Wedge shaped tenons.
● Tongue too tall / groove not deep enough usually between the tenons,
● Waste in the corners between the tenons. (from turning the saw and not getting it
cleaned up)
Other issues i used to find but learned not to make these mistakes!
● Shoulder lines not square, or parallel (clamped guide wrong, used a non straight guide)
● Bottom shoulder bottoms out before face shoulder.
● Mortices cut in wrong spots (mark your waste)!
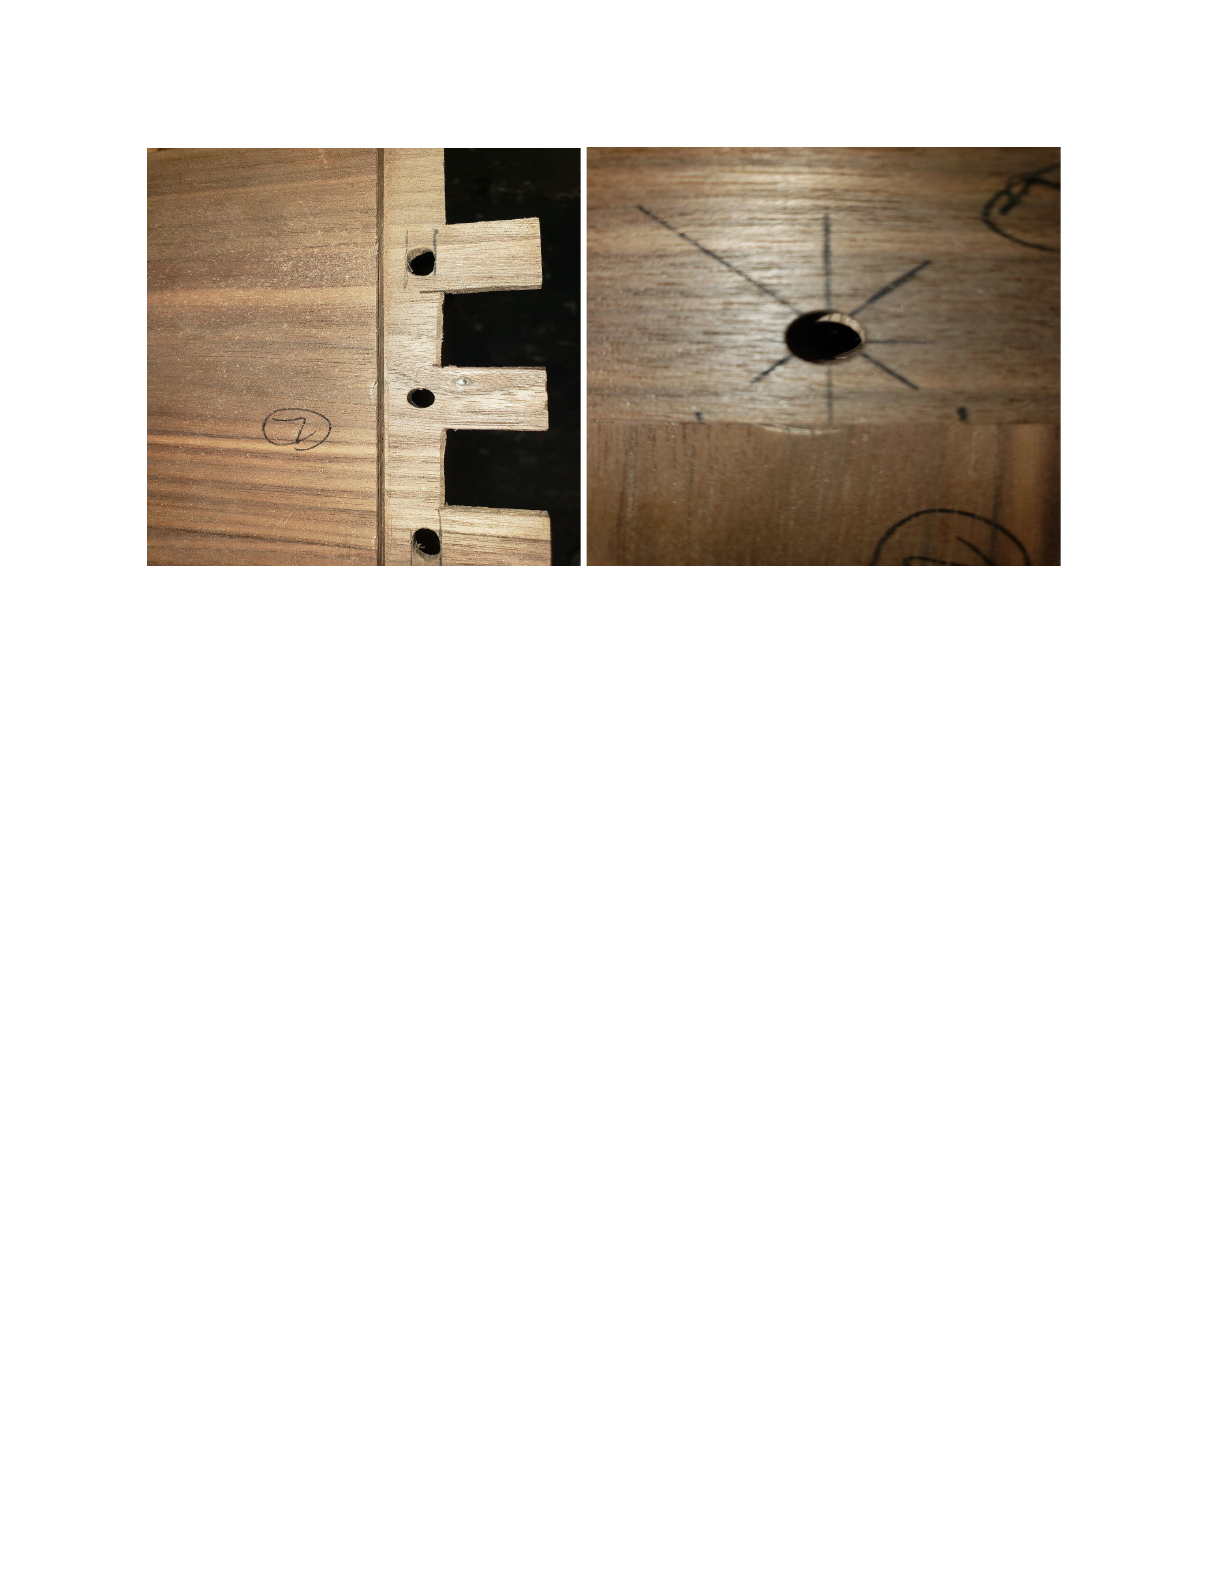
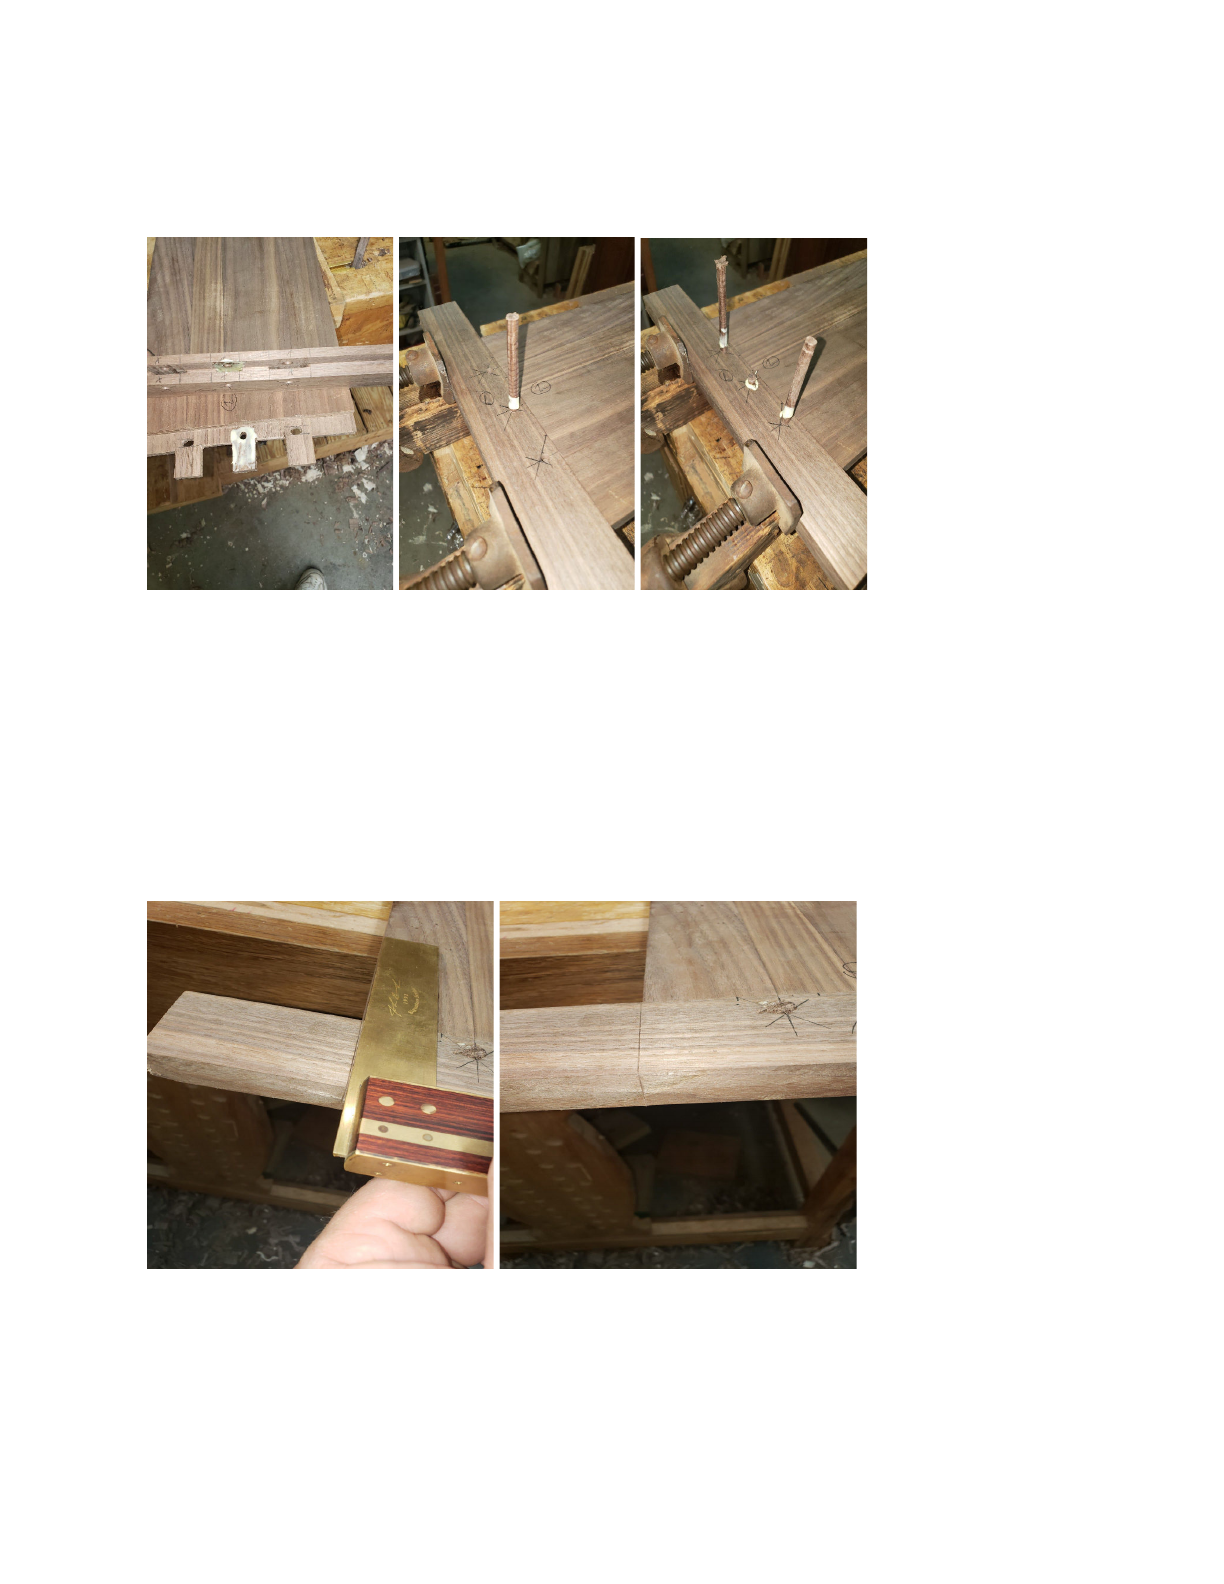
Drawboring:
At this point, If you have not given up on these stupid B&B’s we have a panel with 2 overlong
and slightly thicker breadboards seated along the face shoulderline. Remove the breadboards
from the panel, using the original marks for the mortices, (the ones before an allowance for
movement. Create an X on the face of the breadboard to achieve a centerline of the tenon.
Mark the centerline through the X. measure an eye pleasing space from the shoulderline of the
breadboard leaving at least 1” of tenon behind the mark. (in this case between ⅜” and 1⁄2” from
the shoulder line). Leaving at least 1” behind the pin will insure the tenon does not split or blow
out behind the pin.
Again for this demonstration, I will be using a ¼” pin. Drill straight through the breadboard with a
brad point or forstner bit. Centered in the mark. Drilling just deep enough for the point to pierce
the bottom. Then flip the breadboard and finish the drilling from the bottom. This prevents
blowout that happens when drilling straight through from 1 side only.
Now we will create a spring joint for the breadboard to keep the shoulderline tight for 100 years.
Long after we are dead and gone. Mark the location of the edges of the panel in relation to the
breadboard edge with the groove. (mark off the overhang) with a sharp bench plane take a light
pass in the center of the edge approximately ⅓ the length of the board, now take a second pass
approximately ⅔ the length. This will create a shallow cup in the groove edge of the board and
creates our spring joint. Do this for both breadboards, install the breadboards with their holes
drilled and spring joints to their perspective places on the panel. Use 2 long clamps that will
clamp the length of the panel and breadboards. Place the clamps between the tenons on both
sides of the center tenon. If all is correct, you will have a very tight shoulder line that you can not
get a fingernail to catch in from edge to edge along the panel and breadboard. Using the same
drill bit used to drill the breadboards, insert the bit into the hole until it rests on the tenon. With a
small tap hit the back of the bit to leave a mark from the center point of the bit in the tenon
cheek. Remove the clamps and breadboards. Using an awl, make a new mark about 1/32”
closer to the shoulder. I said CLOSER to the shoulder! CLOSER to the shoulder!! If it is
done any different, all the work we have done up until this point was for nothing. Remember
CLOSER to the shoulder. Ask me how I learned this. How Daring are you? Using the same bit
we drilled the holes in the breadboard with. Drill the same hole in the tenons in the new mark
that should have closed up the original mark (hopefully). In the outer tenons elongate the hole
parallel to the shoulder making sure the edge closest to the end of the tenon is straight and
parallel to the shoulder. Elongate it the same distance as the amount of extra room left in the
mortices. If done correctly we now have 2 holes that are offset from each other when the
breadboard is reinstalled. With the holes in the breadboard offset to the outer edge from the
holes in the panel. This sets us up to be able to keep the breadboards under tension
throughout the life of the project.
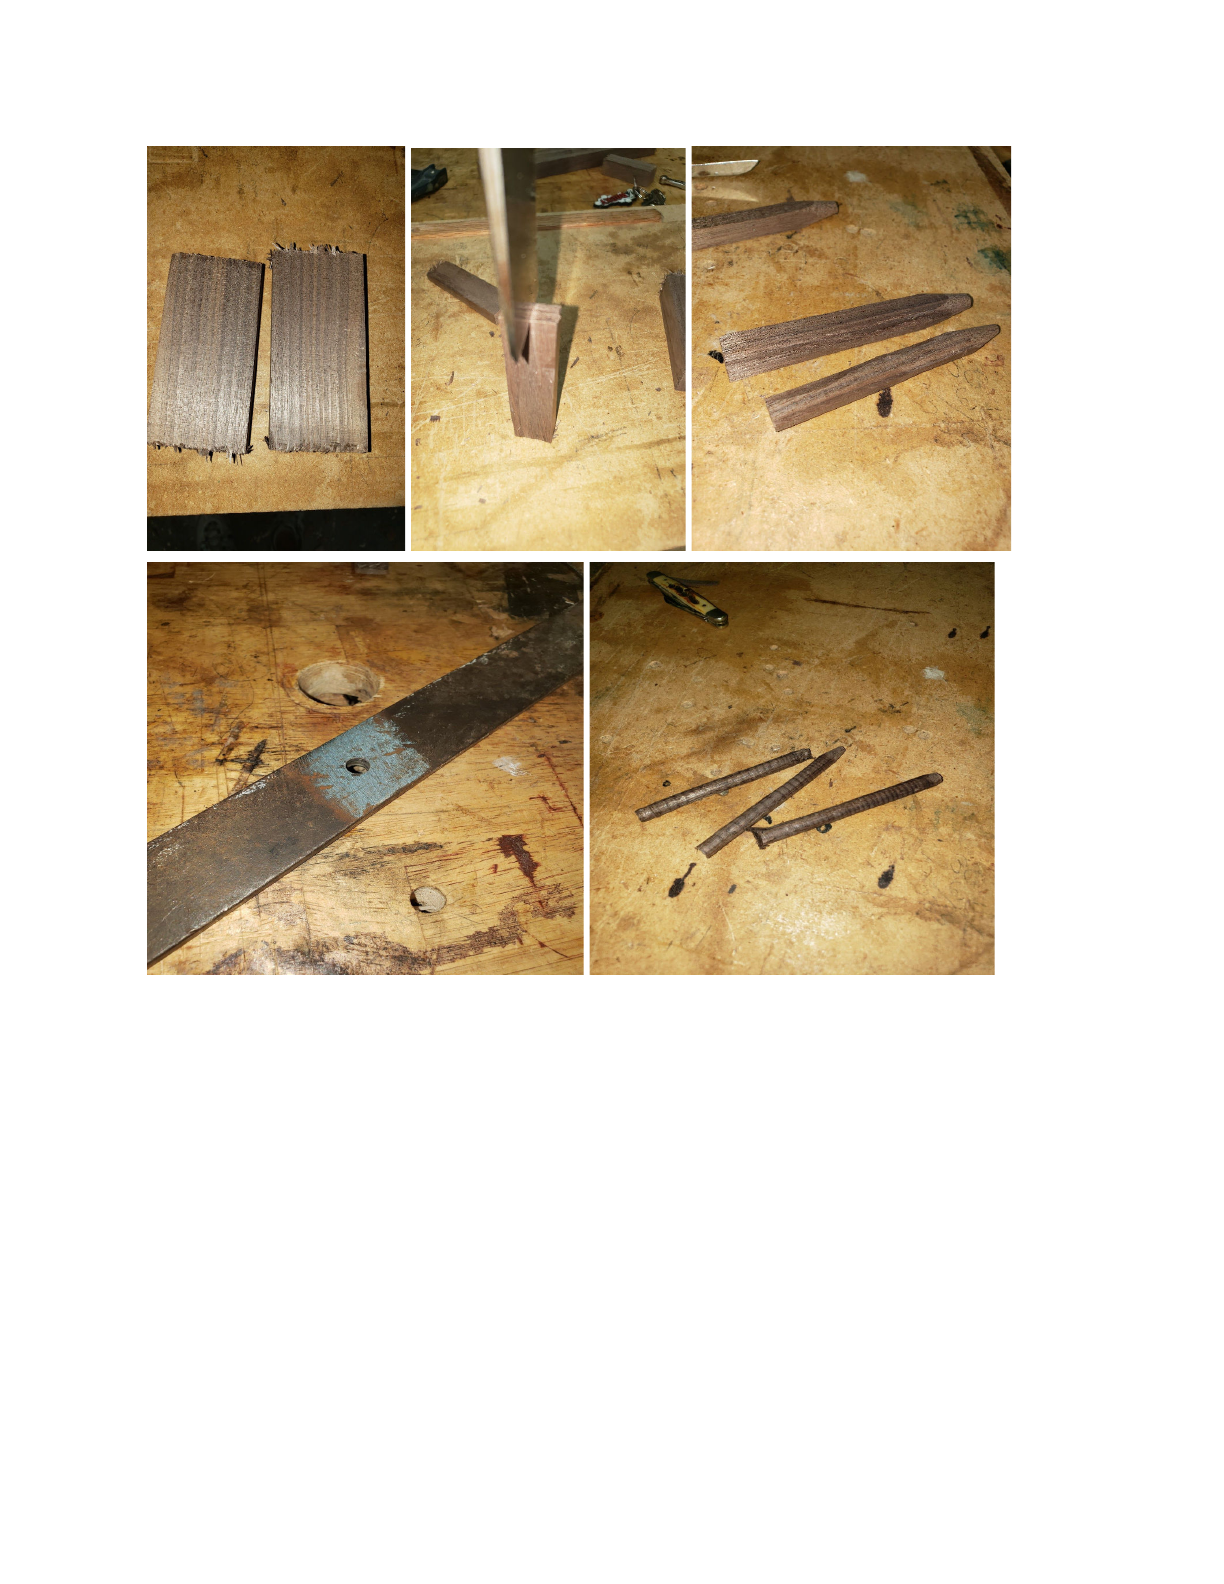
Rive the pins:
Quality work means quality materials. For good quality pins we want to rive them from straight
grain stock. Typically I use the same materials I made the panel and breadboards from. Unless I
am wanting them to contrast one another. Like maple pins in a walnut table top. It is simple to
make your own draw pin plate. Get a piece of steel ¼” thick or so. Drill a hole. I like to oversize
my pins a touch. If I drilled a ¼” hole for my breadboards I will drill a 17/64” hole to rive my pins
with. This will ever so slightly oversize the pins and make for a nice tight fitting pin that does
not have any gapping.
To start, get a scrap piece of straight grain wood about 4 inches in length. Split off a section
about ½” squarish with a mallet and chisel. Keep splitting off small sections to get it roughly ⅜”
squarish. Whittle a point on one end. And whittle down the corners to make it more octagonal
then square. Then grab a metal hammer and drive it through the hole in the steel plate. Whittle
a new finer point and it's done. The closer you whittle the pin to the size before it is driven
through the hole the better the pin will be. It will be easier to drive and have a smoother shaft.
Make a couple extra, just in case.
Stay away from Dowels. Even straight grain dowels. They typically will have warped and have
more of an egg shape then a circle. Besides, it is cheaper to make our own dowels from scraps
we would be throwing away or burning at the next bonfire.
Pinning and glue up:
Gather all the parts. Do a final dry fit of the breadboards to the panel. All look good? Take them
off. Get 2 long clamps. Preset them to the correct size needed with the screws retracted. Get
the glue bottle and a spatula. Gather the pins and a metal hammer.
Spread glue on the center tenon only like gluing any other tenon and the correct mortice in the
breadboard. Do this for both breadboards install them. If needed use a mallet to set them in
place. Then line up the holes as best you can by eye. Apply the clamps the same way we did
earlier. Apply a small bit of glue to the pins for the center tenons. Drive them through, drive them
through so the whittled point is past the bottom of the breadboard. Do both center tenons first.
Then apply a small bit of glue to the pins only and drive them into the outer holes. Wipe off any
excess glue with a rag. Trim the pins close to the breadboards with a saw. Finish up the pins by
planing flat, do this for the top and bottom of the panel.
Using a square, mark the ends of the breadboards that we left long. Mark them even with the
panel edges. Cut them with a cross cut saw. Dress up the edges with a handplane. We can
Now plane down the surfaces so they are all coplanar. Bring the thickness of the breadboard to
the same thickness as the panel. Leaving them thicker during construction allows us some
leeway if our tenons are not perfectly straight, or our panel is not perfectly flat we can adjust this
with the thickness of the breadboard.
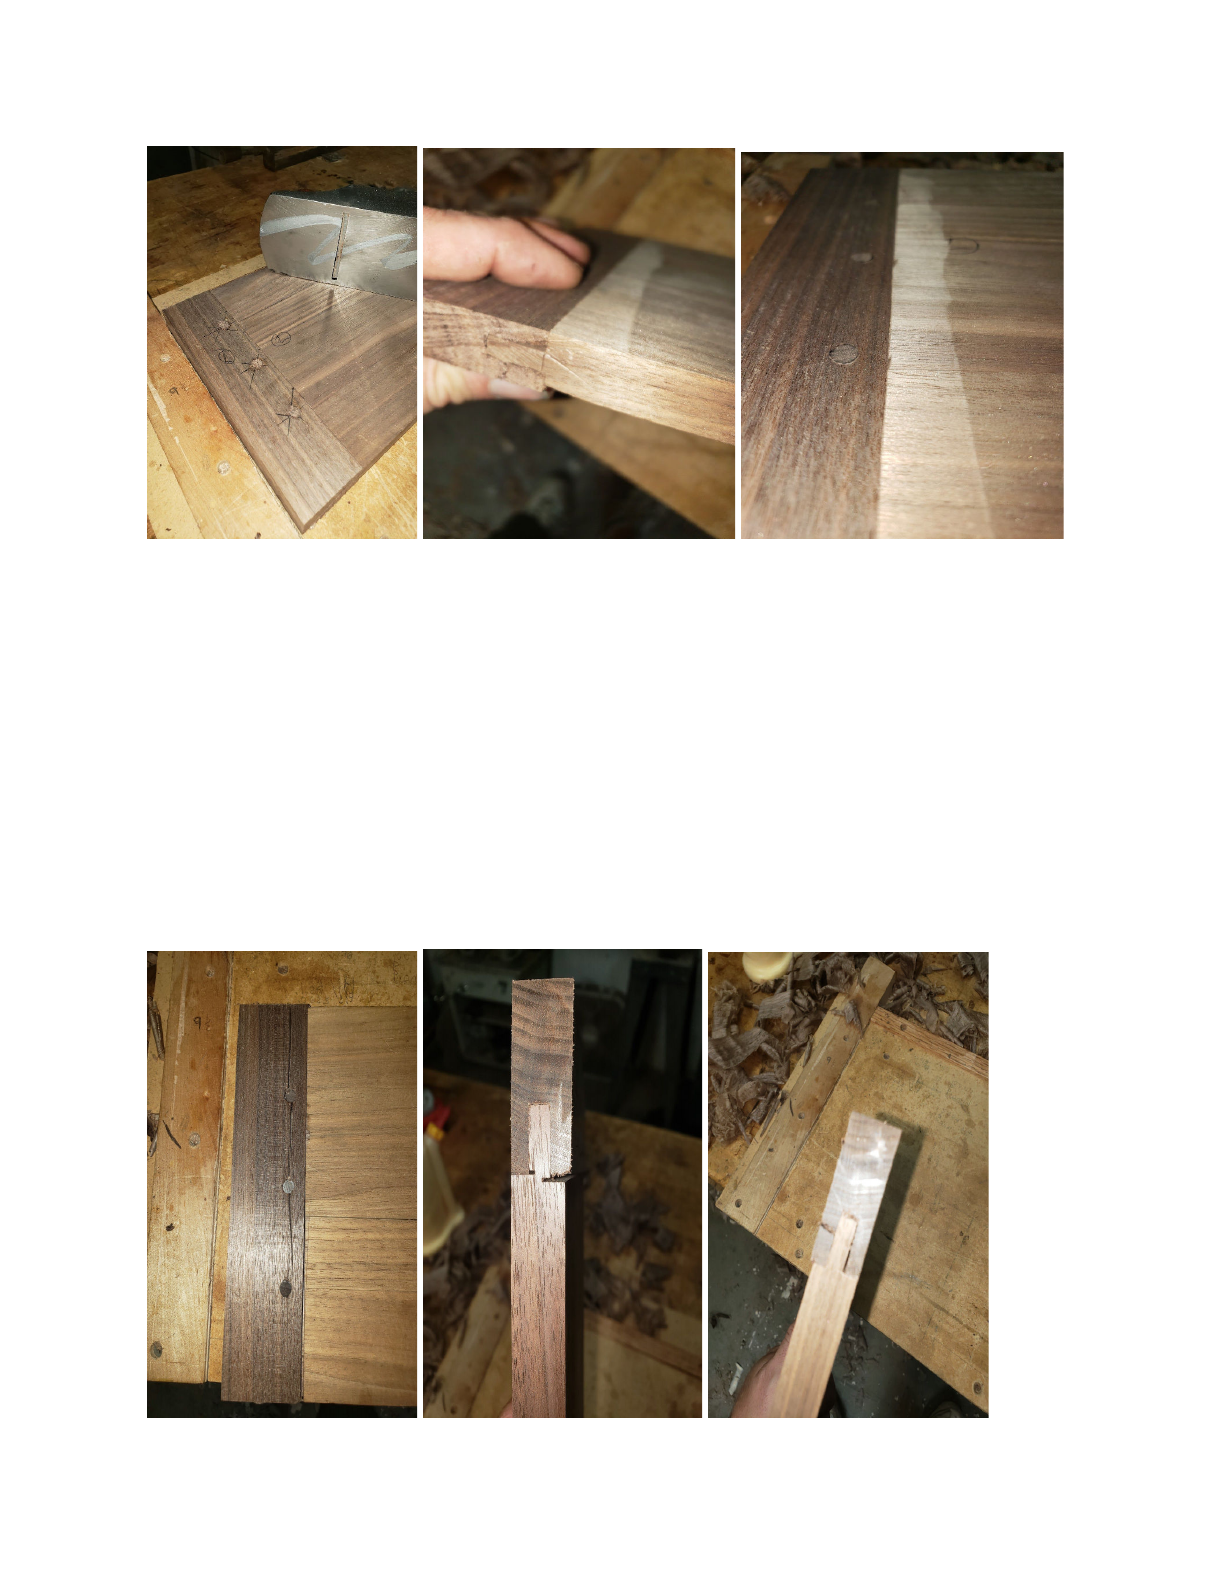
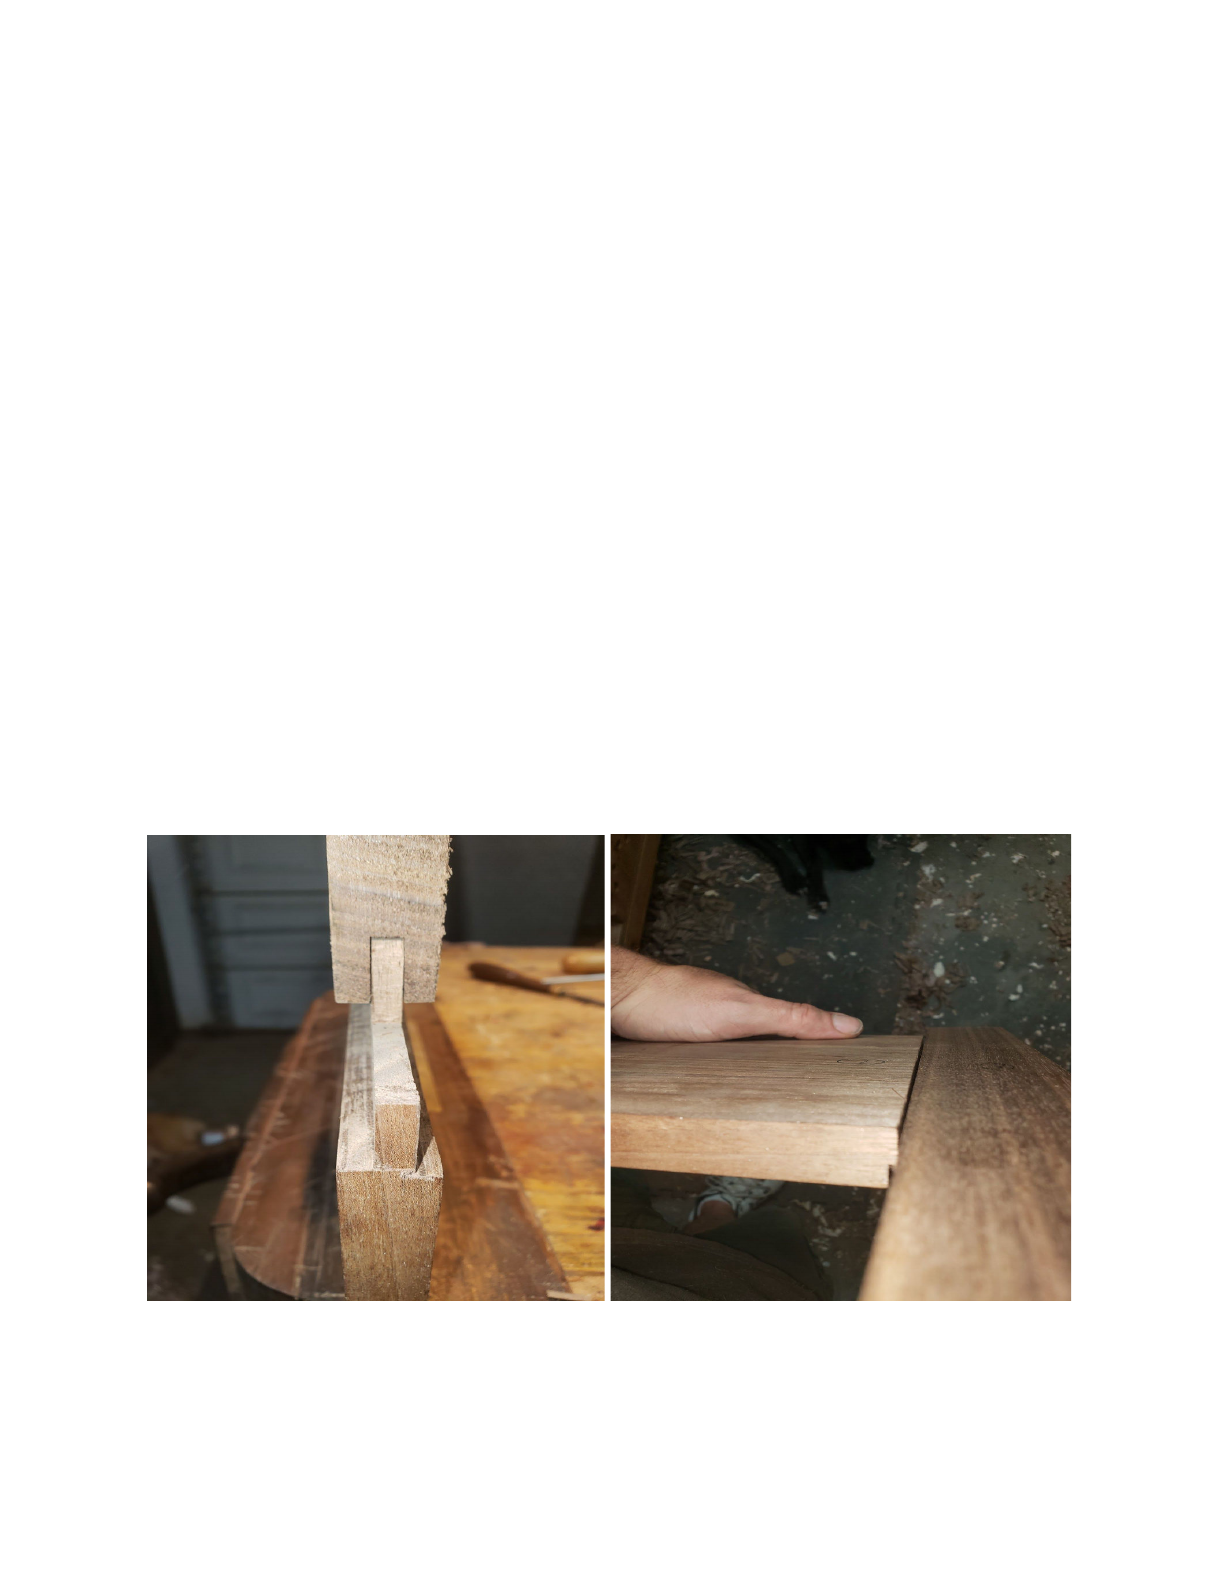
Finally:
I could have ended it here, with only the good pictures showing, However, I feel full disclosure is
needed, this breadboard was a failure. It split out the back of the breadboard. I think due to poor
sawing along the line. I ended up with a gap I failed to look at. and it allowed room for the
narrow section of the breadboard to split. I think it was caused from the oversized pins. The
oversized pins require both shoulders to be a good fit. Also, I was careless when I was sawing
to the tongue lines and i over cut the line. Finally I left a bit of a gap on one end of the tongue
that shows.

Thank you for your time in reading this,
John
